Subnet
View a Subnet
- Open the Amazon VPC console.
- In the navigation pane, click VPCs.
- Select the VPC that you want to view subnets for.
- In the Subnets tab, you will see a list of all the subnets in the selected VPC.
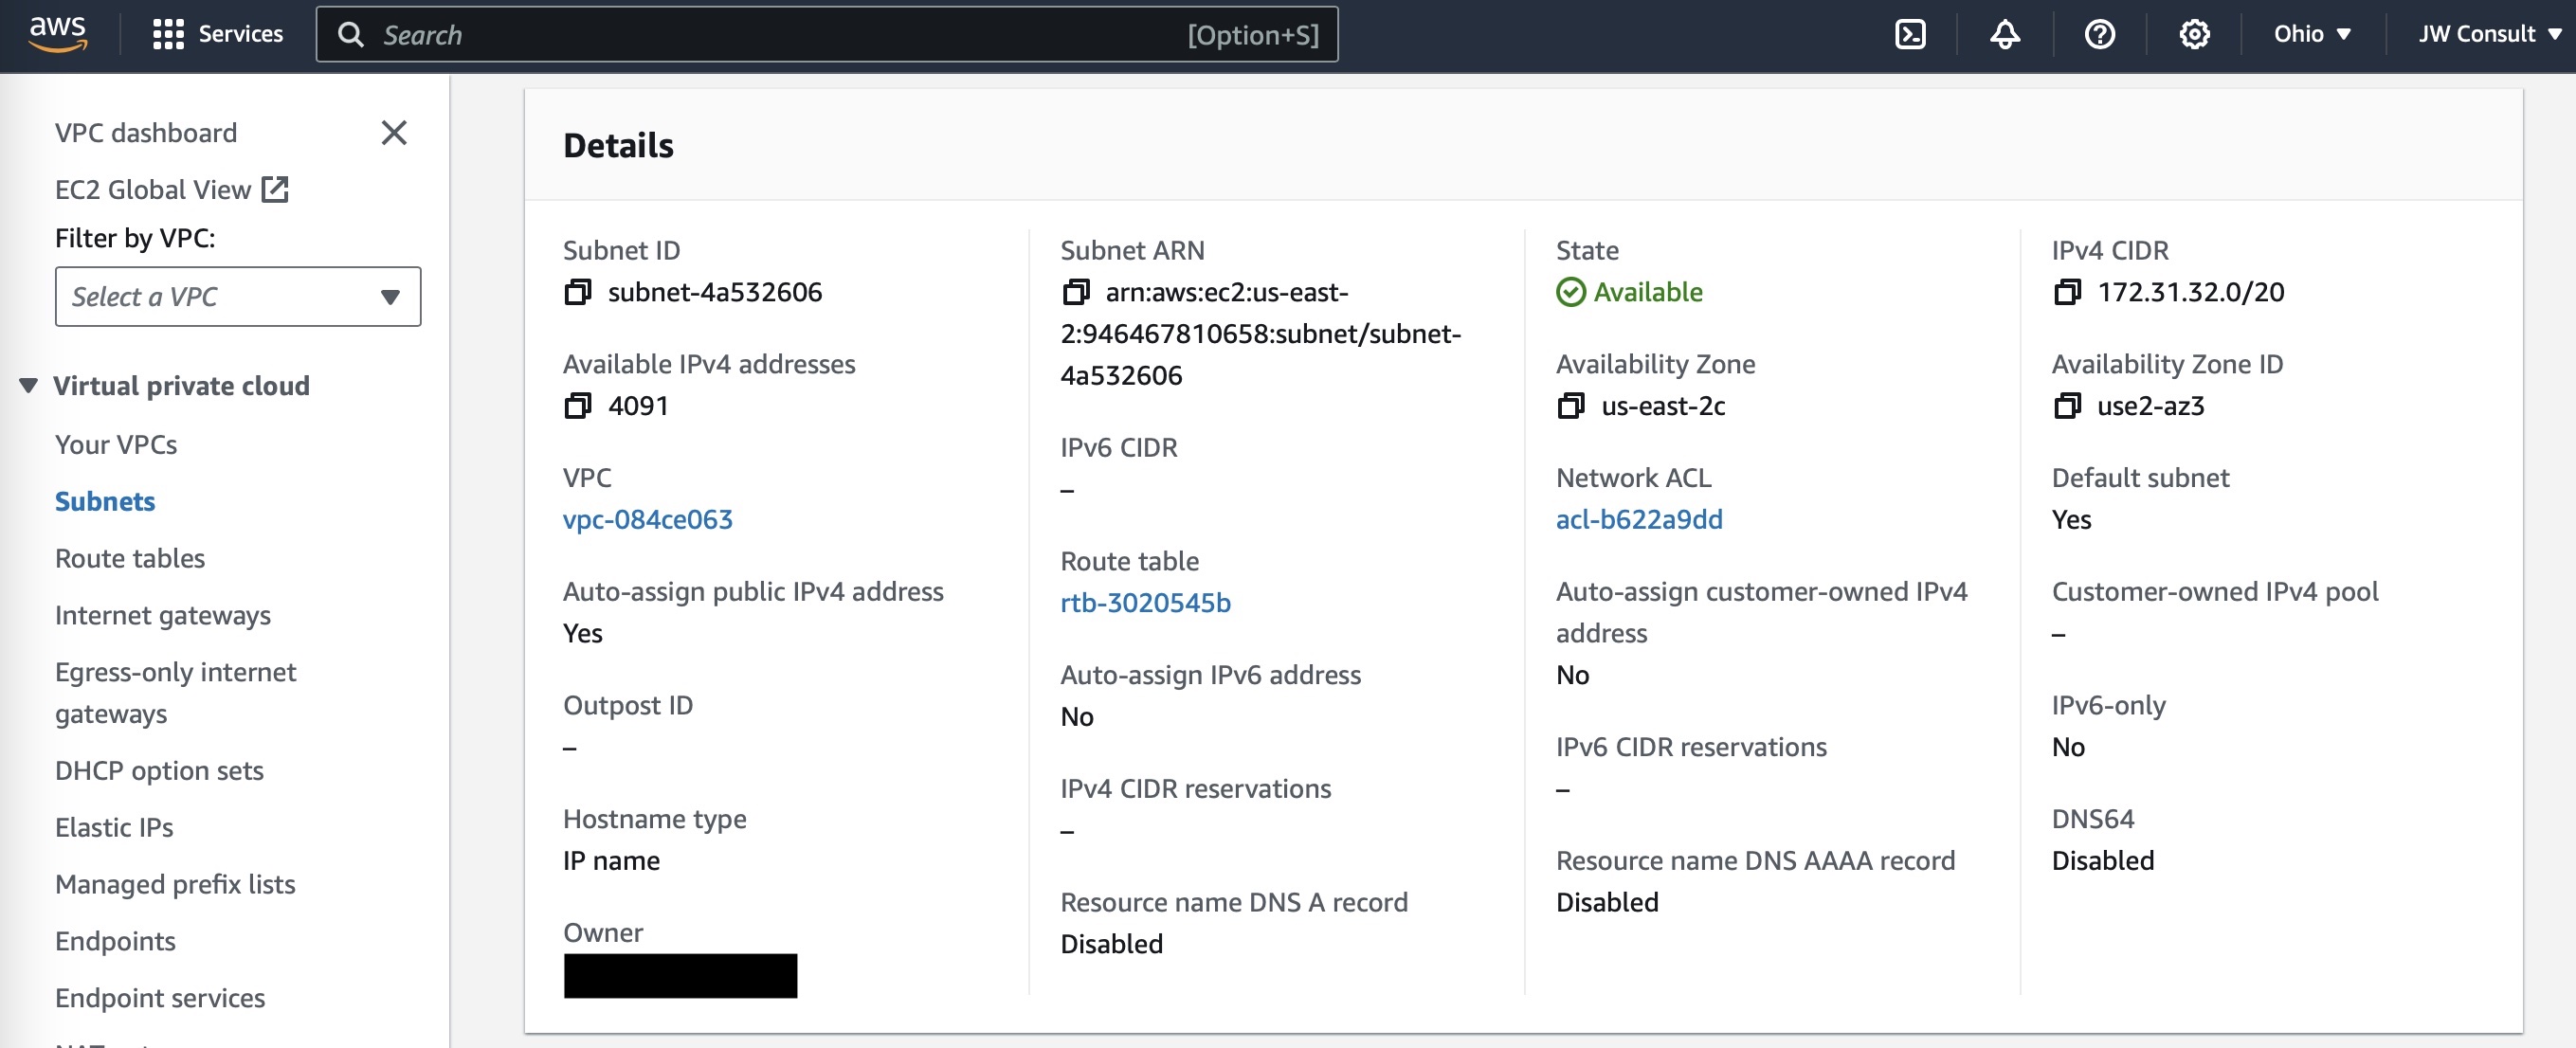
Note
Subnet CIDR of 172.31.32.0/20 supports a maximum of 4,094 address in the range of172.31.32.1 - 172.31.47.254
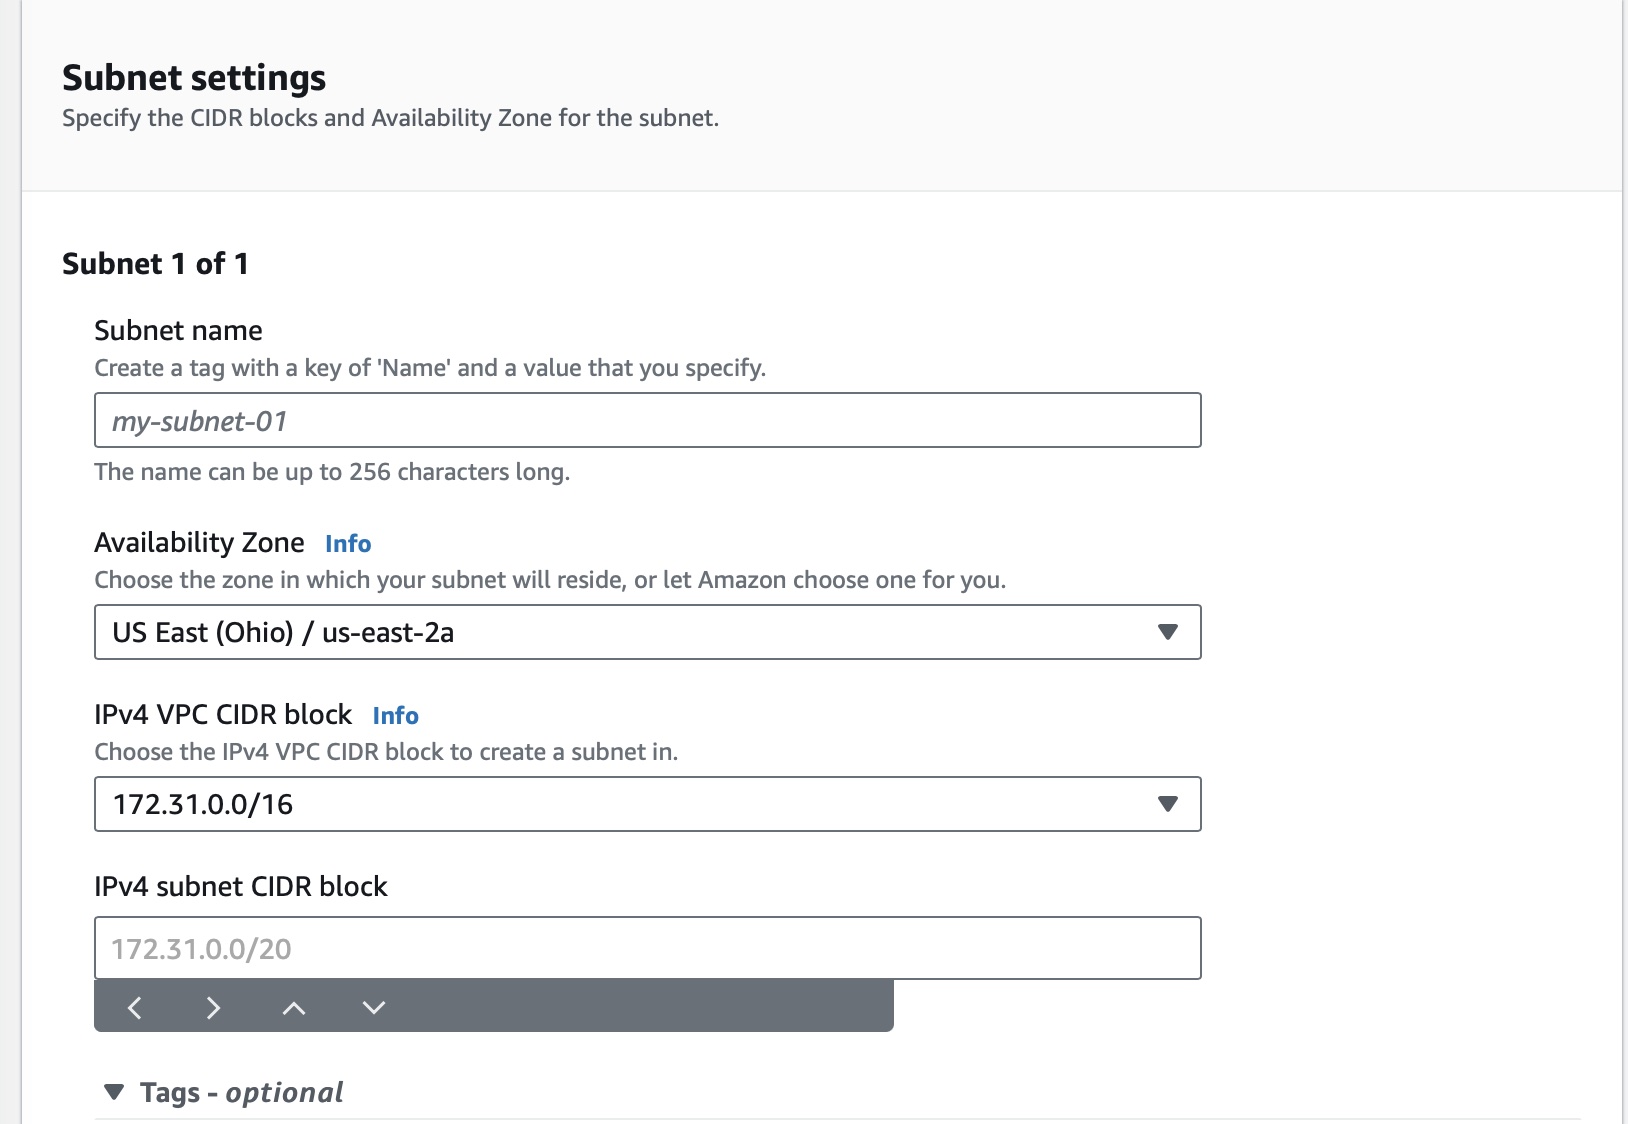
Create a Subnet
- Open the Amazon VPC console.
- In the navigation pane, click VPCs.
- Select the VPC that you want to create a subnet in.
myvpc - Click Actions, and then click Create Subnet.
- In the Subnet Name field, enter a name for the subnet.
mypublicsubnet - In the VPC ID field, select the VPC that the subnet will be in.
myvpc - In the CIDR Block field, enter a CIDR block for the subnet.
10.0.0.0/24 - In the Availability Zone field, select the availability zone where the subnet will be located.
ap-south-1a - Click Create Subnet.
- This is still not a public subnet, by default there is no Internet Gateway attached. You will add this in upcoming excercise.
- When you create a subnet its associated "Routing Table" and "Network ACLs" are also created. You just need to edit them to your requirement.
Note
Subnet maps to one Availability Zone and always associated with a VPC