Routing Table
Viewing Routing Tables
- Open the Amazon VPC console (https://console.aws.amazon.com/vpc/).
- In the navigation pane, choose Route Tables.
- Select the VPC for which you want to view routing tables.
- The routing tables for the selected VPC will be displayed in a list.
- Click on the name of a routing table to view its details.
Note
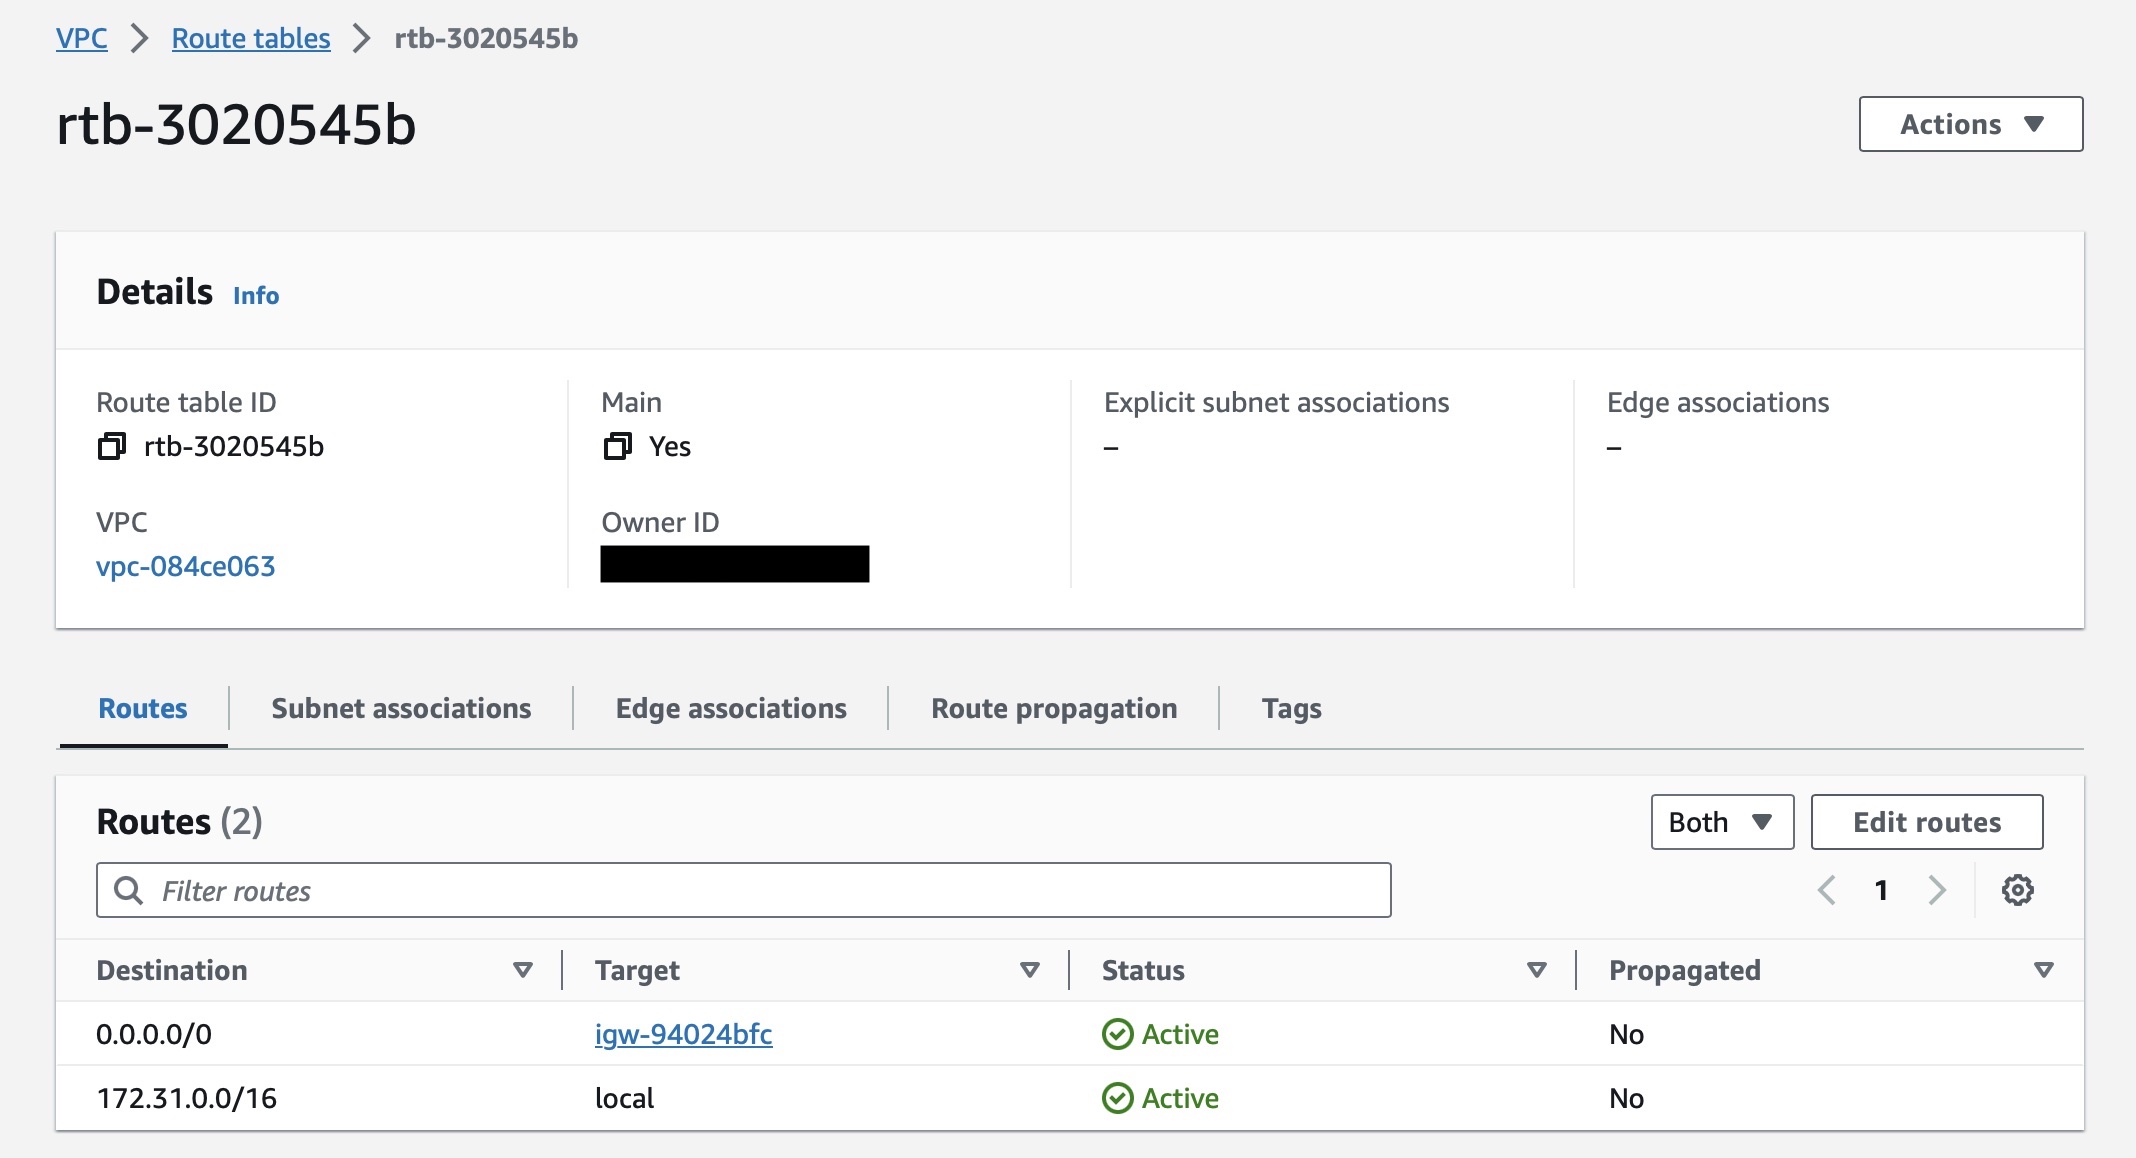
This table shows a destination 172.31.0.0/16 and target local - meaning that any traffic goes to this IP range will be routed locally within the VPC.
0.0.0.0/0 meaning that any other IP outside that range will be routed to Internet Gateway from which the traffic will be passed out to the internet
Editing Routing Table
- Open the Amazon VPC console (https://console.aws.amazon.com/vpc/).
- In the navigation pane, choose Route Tables.
- Select the VPC
myvpcfor which you want to view routing tables. - The routing tables for
myvpcwill be displayed in a list. - Click on the name of a routing table to view its details.
- To make the subnet associated with this routing table to access the internet, you need to add a new route as below,

- Click "Save Changes" and now the subnet is public subnet